You are here: Social > Ratings and Reviews > Making Items Ratable

Making Items Ratable

Once you set up the Ratings and Review feature for LearnCenter, you can indicate which LearnCenter items can be rated and reviewed by end Users. If you have not already done so, complete the first few steps in Setting up Ratings and Reviews before making items ratable.

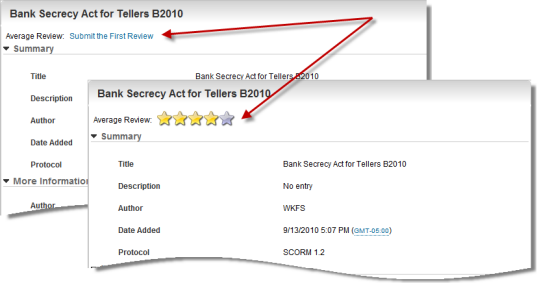
When items can be rated or reviewed, end Users will notice either a row of stars or text indicating they can be the first to review an item.

To make items ratable, do the following. On the Control Panel:

  1. Click on the Social menu to expand it.
  2. Click Reviews.
  3. Click Review Settings.
  4. Select one of the following from Item Type:
  1. Click Find Rating, and select one of the rating scales you set up.
  2. Click one of the following for Allow Users to review:
If you allow users to review the item, upon submission of a user’s review, the review is created with a status of Pending Approval. The appropriate moderator for the item type can go to the Submitted Reviews page and decide the status of the submitted review. If a user has moderator permissions and is also allowed to view reviews for that item type, when that user submits a review or makes a modification to a review, it will not require approval. It is immediately posted against that item as an approved review, since the user has the ability to go into the management pages and approve the review regardless.
  1. Click the Comments Require Approval check box if you want to the ability to evaluate all comments before they become visible to other end Users. This setting is useful for filtering inflammatory comments you may not want made public. Admins who have been granted the appropriate Ratings and Reviews User Permissions will receive a Communication Message when a comment has been submitted by a User. They can then navigate to the Reviews page to approve or reject comments.
    or
    Clear the check box to allow all User comments to become visible immediately.

Ratings and Reviews includes a built-in obscenity feature that works regardless of whether you have clicked the Comments Require Approval check box. If you have clicked the check box, you have the ability to evaluate, and then approve or reject comments before they are made public. If you have not clicked the check box, obscenities are automatically masked but the comments are still made public.

At this time, the obscenity filter is only available for comments written in English-US.

  1. Click the Show Review Bar check box to if you want to show the page rating bar in the LearnCenter pages. (Default)
    or
    Clear the check box if you do not want to show the page rating bar in the LearnCenter pages.
  2. Click the All items can be reviewed except option button if you want to include all items of this type to be reviewable with the exception of the items in the list. (Default) Click Find to locate and select the items you want excluded from the list.
    or
    Click Only the items below can be reviewed option button if you want only the items in the list to be reviewable. Everything else is not reviewable. Click Find to locate and select the items you want included in the list.
  3. (Optional) Click to select the items to insert into the inclusion rule list.
  4. Click Save.
  5. Click Back to return to the Reviewed Items page. This button is not visible if you have not been granted at least one of the four view reviews sub permissions of the Manage Reviews User Permission. For example, if you have been granted the View Class Reviews permission, you can see the Back icon.

Related Topics IconRelated Topics


Copyright © 2010-2018, Oracle and/or its affiliates. All rights reserved.