 on the Assessments/Surveys
menu to expand it.
on the Assessments/Surveys
menu to expand it. next to the Instance you want to
view or edit.
next to the Instance you want to
view or edit. You can view and edit the properties of existing Instances. On the ControlPanel:
on the Assessments/Surveys
menu to expand it. next to the Instance you want to
view or edit. The Selected Assessment and Type fields are pre-filled. You cannot edit these fields.
Example: This test has 10 questions. You must score at least 80% to pass the test.
Example: We hope you are pleased with your score.
|
|
The Insert into Global Catalog check box displays if global sharing is enabled. See Global Sharing for additional information. |

|
If a User in one LearnCenter attempts to open an instance that was created in another LearnCenter, and that instance is not shared globally, a message displays: "You are not authorized.” If you want Users to be able to launch instances that were created in another LearnCenter, you must change those instances' sharing statuses to be global. |
The fields in the Item Association section are pre-filled. You cannot edit these fields.
|
|
If you select Show Questions grouped by category and the Question is mapped to multiple Categories, then the first mapped Category is considered the mapped Category. In addition, this option groups all Assessments in the Category field of the Edit Assessments page by Category. |
|
|
If the Assessment is mapped to multiple Categories, the first Category displays as the header. If you click the Next button, the second Category name display as the header. |
|
|
Do not select Yes for this option if your Answer choices contain “All of the above.” |
|
|
This option only displays if you selected Course from the Select the LearnCenter item type to associate the assessment with drop-down list. |

|
If you selected Yes for the Show details option, the Show Incorrect Responses Only, Show Only User Responses, and Show Point Value options display. See Instances Results Page Examples for additional information.. |
|
|
If you set Show only User Responses to Yes, the author feedback displays after the Your answer section. If you set Show only User Responses to No, the author feedback displays beneath the respective answer and not underneath the Your answer section. |
|
|
This field does not display if you selected In Course from the Type of Assessment drop-down list. |
|
|
This field only displays if you selected Course from the Select the LearnCenter item type to associate the assessment with drop-down list and Pre-Test from the Type of Assessment drop-down list. |
|
|
This field only displays if you selected Course from the Select the LearnCenter item type to associate the assessment with drop-down list and Post-Test from the Type of Assessment drop-down list. |
|
|
This functionality can optionally be applied to the entire LearnCenter by default. You can override the default or specify customization at the instance level through the Customization Required field. Customization is done via an .XSL file. |
|
|
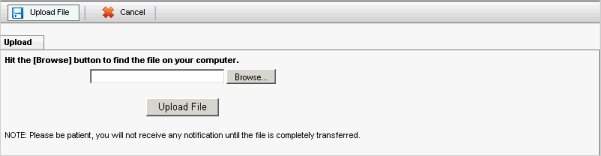
You must first upload the Cascading Style Sheet (CSS) file to the Resource Manager and add your own .XSL file in Configuration Options. See the chapter called "Resource Manager" for additional information about uploading files to the Resource Manager. Uploading a CSS file is optional. You can either create the CSS and XSL files or they can be created by Taleo Learn. |
 .
.

Copyright © 2010-2018, Oracle and/or its affiliates. All rights reserved.
 Related Topics